Researchers in many fields of study utilize herbarium specimens. It takes considerable effort to collect, prepare and store these specimens.
Plant collector’s may have hiked and camped for days to obtain the specimen you are mounting. The specimen must be pressed, dried, identified and have a label prepared. Plant mounting is one of the last steps in the long process. In some cases, there may be few specimens of the plant in existence. Therefore, each specimen should be treated with the utmost of care.
Our goal is to permanently preserve plant specimen collections for long-term study. Therefore, attention is given to insure that all materials used are archival and nothing done to the specimen will degrade its scientific qualities.
Cardinal Rules
- Do not discard anything.
- Take great care not to mix up labels.
- ALWAYS ask questions or put the specimen aside if you do not know what to do.
- Never turn mounted specimens upside down.
- Do not eat or drink anything in the mounting room without express permission.
- Specimen preparation should have your undivided attention. Cell phones usage, including texting, is not compatible with plant mounting.
- Respect others working in the mounting room in regards to your conversations and radio music volume and selection.
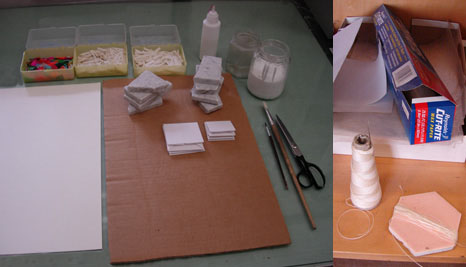
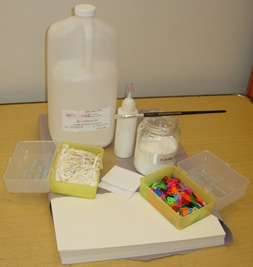
Materials and Supplies
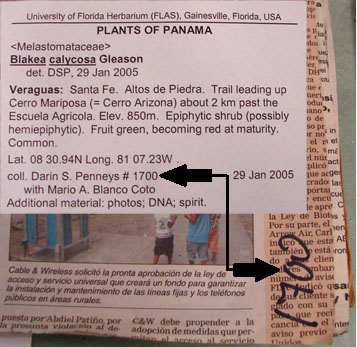
Pressed Plant Specimen with typed label and, possibly, one or more annotation slips.
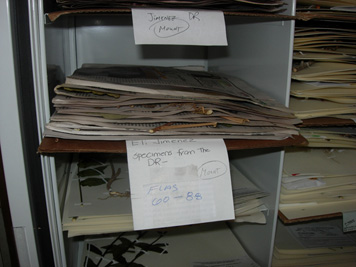
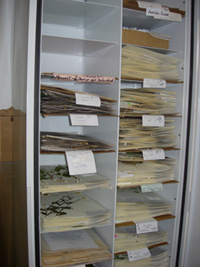
THE MOUNTING CABINET next to the door of the mounting room contains specimens to be mounted. Select the top stack of specimens under the “MOUNT” sign on the left side of the cabinet unless you have been given a special set to work with. Always close the cabinet door securely.
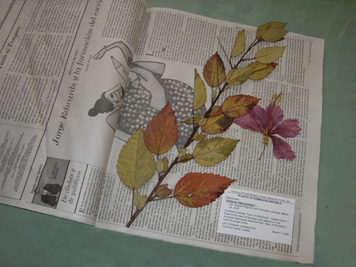
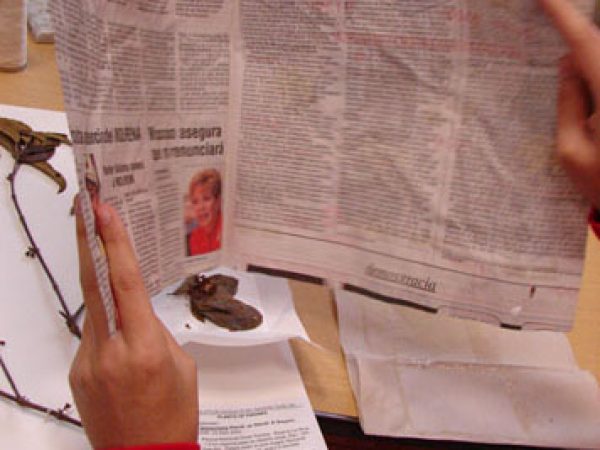
THE PRESSED PLANT SPECIMEN will be in a folded paper cover, usually a newspaper, and should contain one or more typed labels. The specimens may also include slips with plant name changes (annotations), project titles and/or source institutional recognition. Beware, there may be scraps of paper that are not archival and extraneous notes that should not be mounted.
Glue We currently use Jade 403 PVA Adhesive, but this is subject to change.
Each mounter will have their own small jar of glue obtained from the gallon container. The glue should be the consistency of honey, if necessary, it may be slightly diluted (up to ca. 6 parts glue with 1 part water). Be very careful not to dilute the glue too much. Don’t let the glue sit with the top off of the jar for long periods, unless you are using it, it will skim over. Don’t shut the lid of the glue jar or squeeze bottle too tightly and keep them clean or they will become glued shut!
Mounting Paper (acid-free paper, 11 1/2″ X 16 1/2″).
There are two weights. The heavier weight should be used in special cases where the specimen is bulky and the normal weight paper will not support it. When starting a new box, please inspect the box and make sure the sheets are cut evenly and don’t have any blemishes. Make sure each sheet you use is clean.
Plastic Squeeze Bottle
Gummed strips
Fragment packets
Plastic clips
Paint brushes
Scissors
Weights (stone slabs or large metal washers, e.g. we use 3″ and 4″ granite or marble tooling slabs)
Cardboard
Wax Paper
Polyurethane Foam Pad
Scalpel
Paper Towels
Thread
Evaluate the Specimen
 Will the specimen fit on one herbarium sheet?
- Is the specimen particularly bulky? Is it suitable for mounting on our standard paper? Or, does it need one of our heavier sheets and/or folders, boxes.
- Does it have a label? [What information is on a label?] If so, make sure the label is clearly printed on white paper stock. If the label is yellowed, test it with a pH test pen in an unnoticeable area on the back. Purple indicates acid-free paper which is ok. Yellow indicates acidic paper that will deteriorate over time. In most cases these labels will need to be photocopied onto acid-free paper. Such photocopies need to be dark with solid print.
- Are there enough labels? If the specimen needs more than one sheet, you may need additional labels. The original may be photocopied, or printed from the label file.
- Does the collector # and other label information match any information written on the folded paper containing the specimen?
Note: this information should be saved, see “Save information” below.
Arrange the Specimen
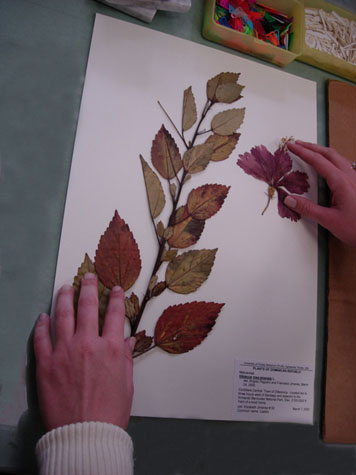 Arrange the plant and label on the correct size of the mounting paper before gluing anything down!
- Labels are placed in the bottom right corner, unless unfeasible due to the shape of the specimen. Only deviate with special permission.
- Annotation slips with name changes go above or to the left of the label. Leave room around the label at the top and left for future annotation slips.
- Leave room for the accession stamp (seal) and barcode preferably at the top right of the sheet.
- Arrange the plant as realistically as possible. Roots or the lower part of the stem usually look better at the bottom of the sheet and flowers towards the top.
- Determine what is the “top” side of the pressed specimen. Usually more flowers or fruits will be evident on this side. Usually more leaves will show their upper side in this arrangement also. At least one frond of ferns specimens should be mounted spore side up.
- Make sure some leaves are bottom-side up. Turn some over if there are not any already pressed that way. A portion of a large single leaf should be cut and mounted with both sides showing, and best of all, a large leaf should be mounted only with cotton mounting tape.
- IMPORTANT: If flowers and fruits are obscured by other plant parts such as leaves try to manipulate the specimen so that those parts show. Also, spread out, bend and fold plant parts so there is less overlap.
- Loose pieces should be mounted so they are obviously separate. If you know where they fell off, you can mount them nearby, but, DO NOT fake the arrangements of parts.
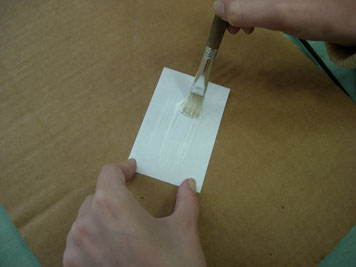
Glue the Label and Annotations Slips
- Make sure your fingers are not dirty or the smudges will end up on the label and sheet.
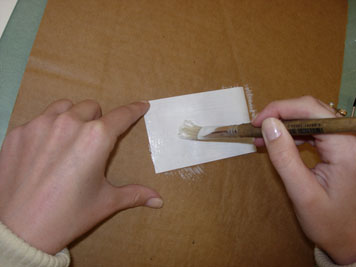
- Paint a smooth, light coat of glue on the entire back side of the label. It should glisten. Start affixing the label from the bottom right corner of the label on the bottom left corner of the sheet. Smooth it down, making sure the bottom of the label is just off the bottom edge of the sheet, and rub it diagonally towards the upper left corner. Cover it with a paper towel and give it a good rub. Place a stone slab to keep the label flat and prevent wrinkling while the glue begins to dry.
- Glue on the annotation slips, if any: Annotation slips go above or to the left of the label. Watch for labels which are in two parts; don’t mount the bottom part as if it were an annotation slip. Leave room around the label at the top and left for future annotation slips.

Glue the Plant Specimen (unless there are instructions to use only strips or sew the specimen)
 Some herbaria only use gummed cloth strips and sewing to affix the specimens to the sheet. If the specimen is suitable for this method, you may attach it that way. Unfortunately, the majority of specimens will shed too much material if only stripped down and will require some gluing.
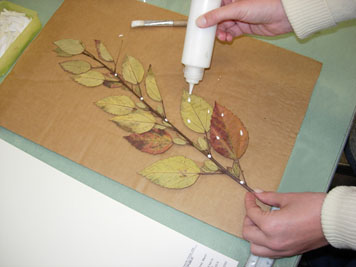
- Paint dots of glue on the back of the plant with a paint brush or with the glue squeeze bottle. Use glue sparingly so that the critical plant parts, such as flowers and seeds, are not embedded in glue and rendered useless for scientific study.
- Each plant will need a different amount of glue. In general, put more glue along the stems, less glue on the leaves and the least glue on the flower and fruiting parts. Leaves should have a dot of glue at the upper 1/3, center and lower 1/3. Inflorescences should have glue mainly on the rachis, peduncles and/or pedicels (aka “stems”); use very little or no glue on the flowers.
- Use weights on the plant parts to maximize contact with the sheet so that the glue properly adheres to the plant and paper.
Add Linen Strips and Sew Bulky Stems
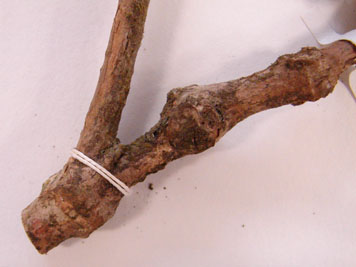
- Affix gummed linen strips across a few places along the stems (especially at the bottom). Try not to obscure too much of the plant with strips. Do not put strips over flowers, flower petals or leaf tips. Cinch the strips tightly around stems. If a stem is bulky “sew” it to the sheet by poking a hole in the sheet on each side, threading cotton string on each side and and tying it on back. Cover the tied string with a gummed cloth strip section.

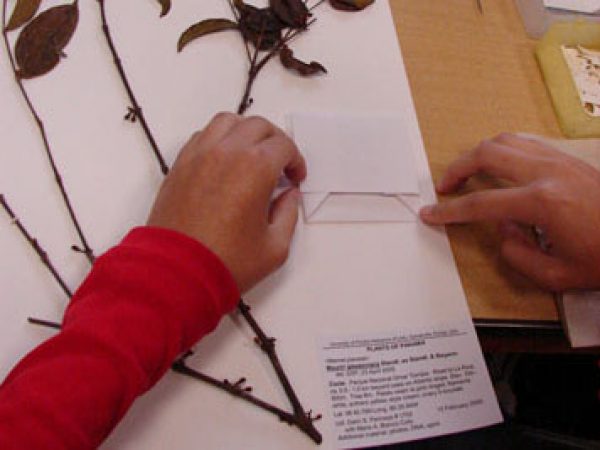
Add a Fragment Packet / Save Loose Pieces
- How to make a fragment packet
- Put a fragment packet on EVERY sheet. Use a packet appropriate to the size of the plant parts that might fall off.
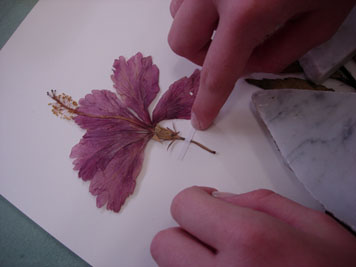
- Be sure to save ALL loose pieces and place them in the packet. If there are any loose pressed flowers, put them in a packet. If there are very many of these flowers, a few may be mounted on the sheet.
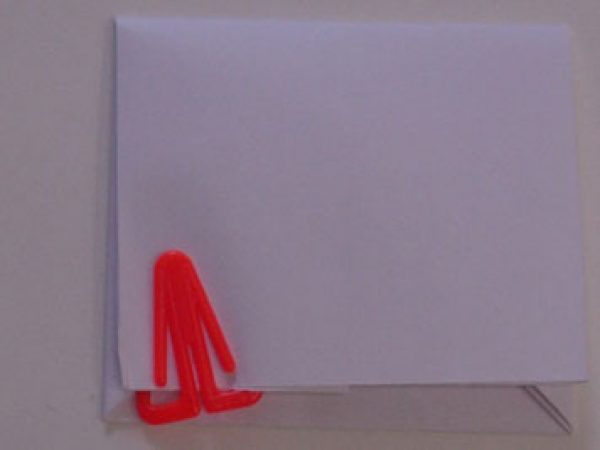
- Secure the packet with a plastic clip, if the packet is large or tends to flap open.
Save Information
- CUT OFF AND SAVE ANY INFORMATION WRITTEN ON THE FOLDED PAPER CONTAINING THE SPECIMEN. Keep this with the specimen as it goes through the stacks.
Tips for Unusual Specimens
- Bark: Mount bark so the outer side shows. It is best to affix bark with cotton mounting tape or sewing rather than with glue, unless it won`t stay.
- Large, but mountable, plant parts: Unusually large stems and other plant parts should go to the right side of the paper, if possible. These parts should be secured with gummed cotton strips or sewed on with archival thread.
- Large, unmountable, plant parts: Large items which can’t be mounted should be tagged with the scientific name, collector name and number, date of coll., brief locality info (Country, State, County, etc.) and accession number. The mounted sheet(s) should indicate that parts of the specimen are unmounted (e.g., cone in box). Please ask the Collection Manager about the handling of such materials; they are usually boxed.
- Fern specimens have special considerations that are detailed in our Fern Specimen Preparation Guide.
Stack the Mounted Specimens
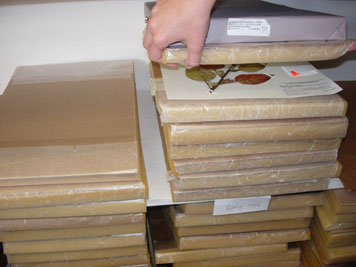
- Stack the mounted specimens in a stack so that the glue will dry. The glue dries in 8 hours or less (overnight). The following sequence should be used in stacking the specimens (from bottom up): cardboard, mounted plant, wax paper, polyurethane foam, cardboard, etc. The wax paper is used to prevent the wet glue from sticking to the foam and cardboard.
Questions
- If you have any questions about mounting a specimen, put it aside and ask!
Additional Comments
Specimens are usually mounted only when they have labels. There are rare instances when specimens are mounted before the labels are prepared. Great care must be taken to make sure the correct collection numbers correlates with each specimen.
- Pencil the collection number as written on the paper the specimen is in on the bottom right corner of the herbarium sheet (where the label will go). Double check to make sure you have put the correct number.
- After mounting the plant cut out all the notes written on the paper the specimen is in. Place these notes in the packet on the sheet. The collection number must be one of these notes.
- Do not put the accession seal specimens which do not have labels.
- Label all stacks of specimens which do not have labels as to the collector, locality of the collections and/or set name.
Specimen Repair
Special instructions will be given for specimen repair. The following are usual guidelines:
- Packets should be added to sheets without them.
- Loose pieces known to be from the specimen on the sheet should be placed in packets.
- Mylar/cellophane packets should be removed and replaced with paper fragment packets. The contents or the whole packet should be placed in the paper packet.
- Old paper packets that are deteriorating and brittle should be replaced.
- Strips should be added to reinforce loose parts. Glue should be used sparingly especially if the paper is yellowing.
- Metal paperclips should be removed.
- Specimens are remounted on new paper on a case-by-case basis. This should be done only with permission from an collection staff member.